
Astrophotography is a trending topic and close to the heart of nature lovers and those who like to spend time outdoors. Modern cameras are capable of shooting noise-free pictures at very high ISOs. The ability to capture clean images in low light (and hence at high ISO) is essential to shoot the Milky Way and other celestial objects. There are some nice spots in India where you can capture the night sky. Here is an astrophotography guide that explains what you need to get great night photos with any camera that can shoot in manual mode.
Contents:
- Examples of Astrophotography
- Equipment for Astrophotography
- The three-step drill – Plan, Shoot, Process
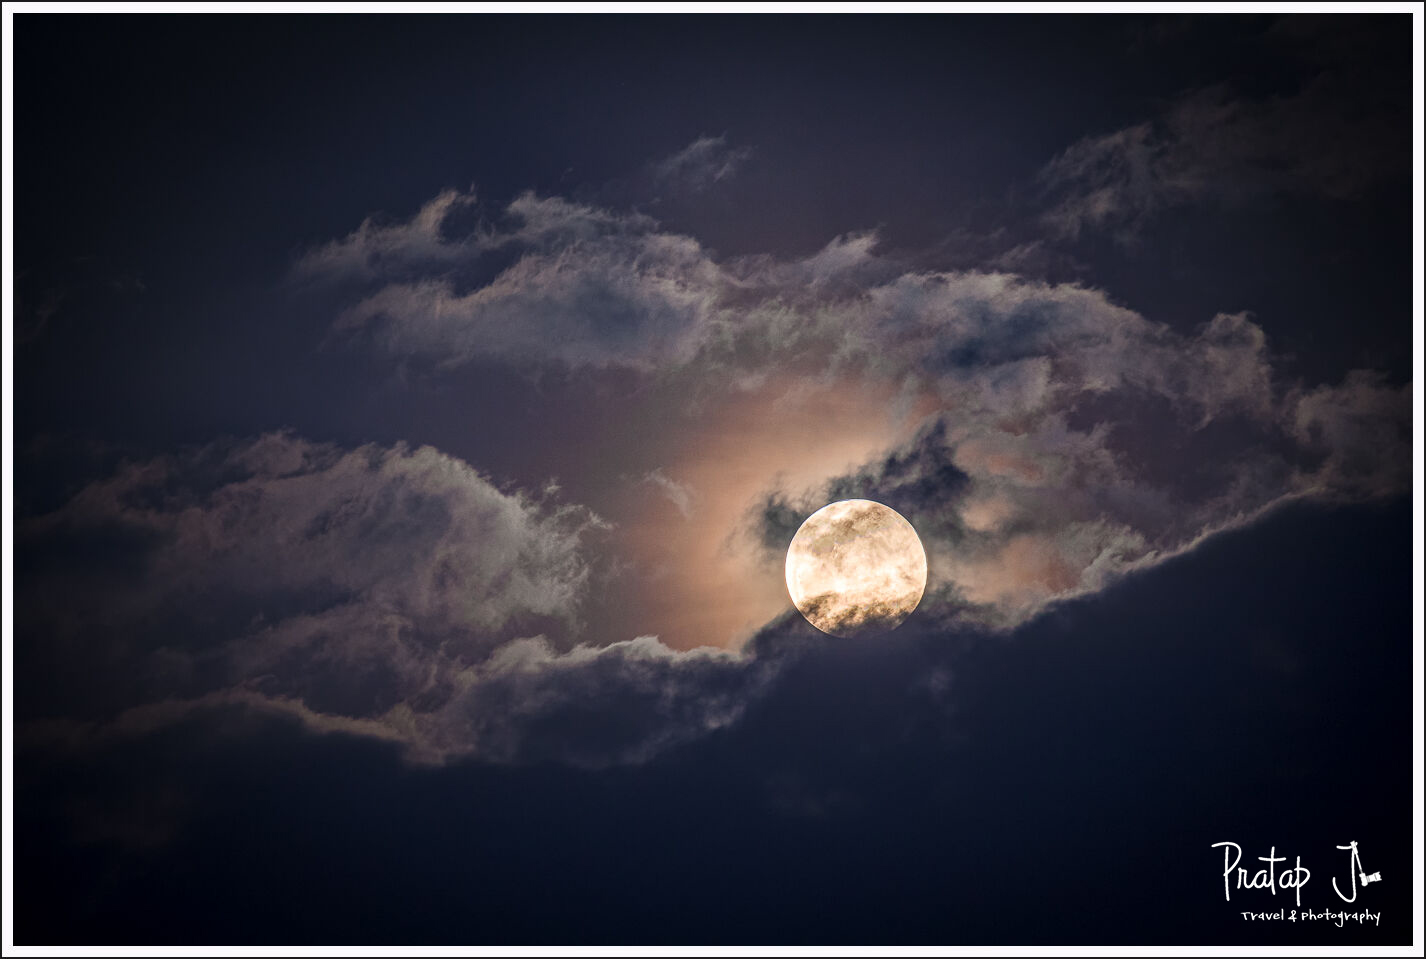
- Bonus guide. How to shoot the moon
Examples of Astrophotography
Astrophotography is a very broad term and can involve shooting a variety of celestial objects after dark. For most of us who do not own specialized equipment, astrophotography is limited to shooting star trails, the Milky Way and the moon. If you own, or have access to a star-tracker or a telescope, you can shoot deep sky objects which are much farther away in the heavens above. Capturing deep sky objects involves shooting multiple, long-exposure photographs through a tracking telescope and using advanced processing techniques to create the final image.
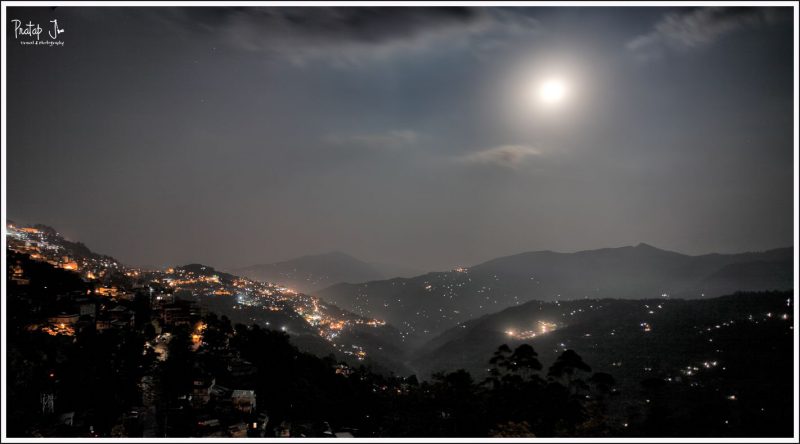
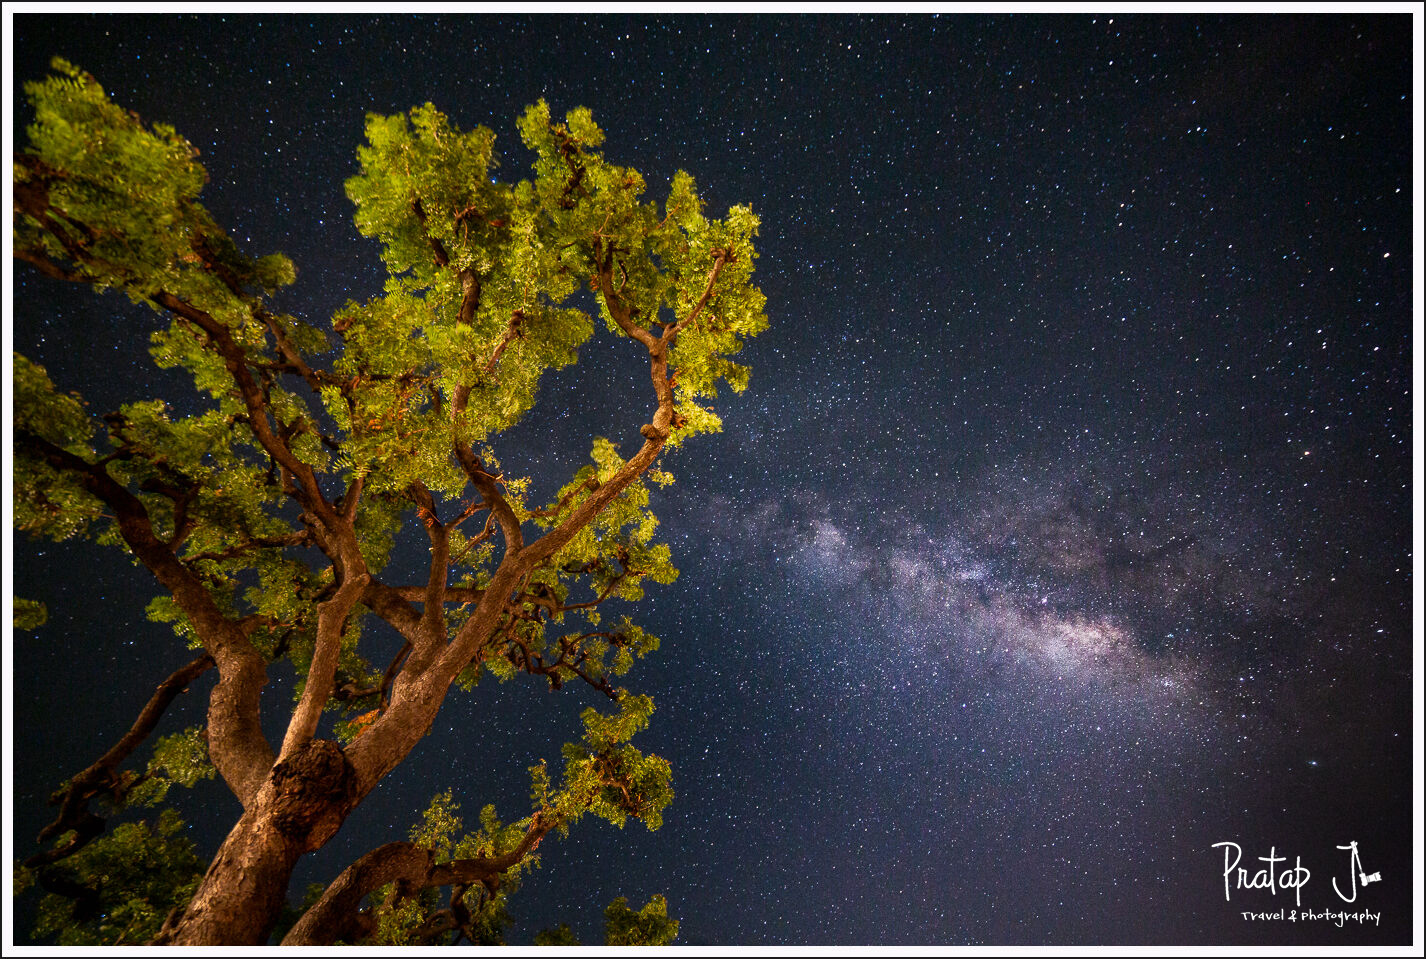
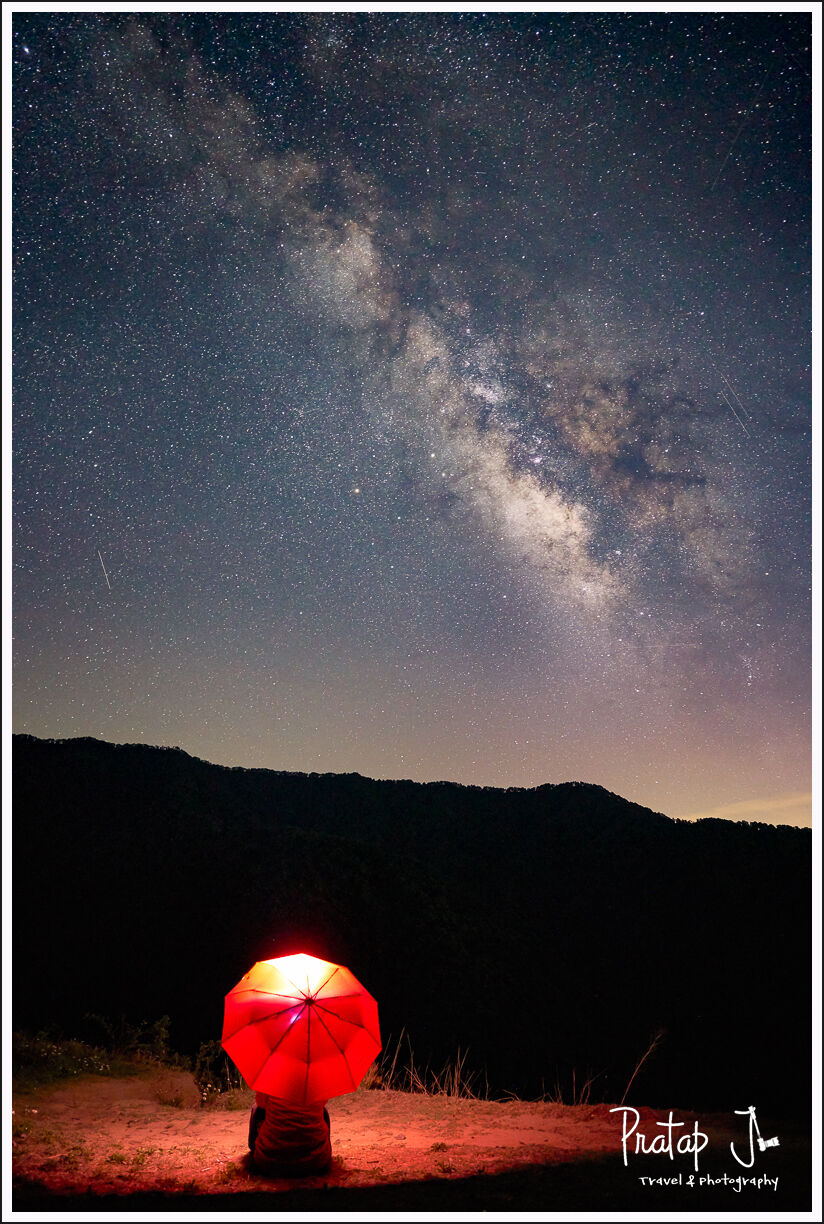
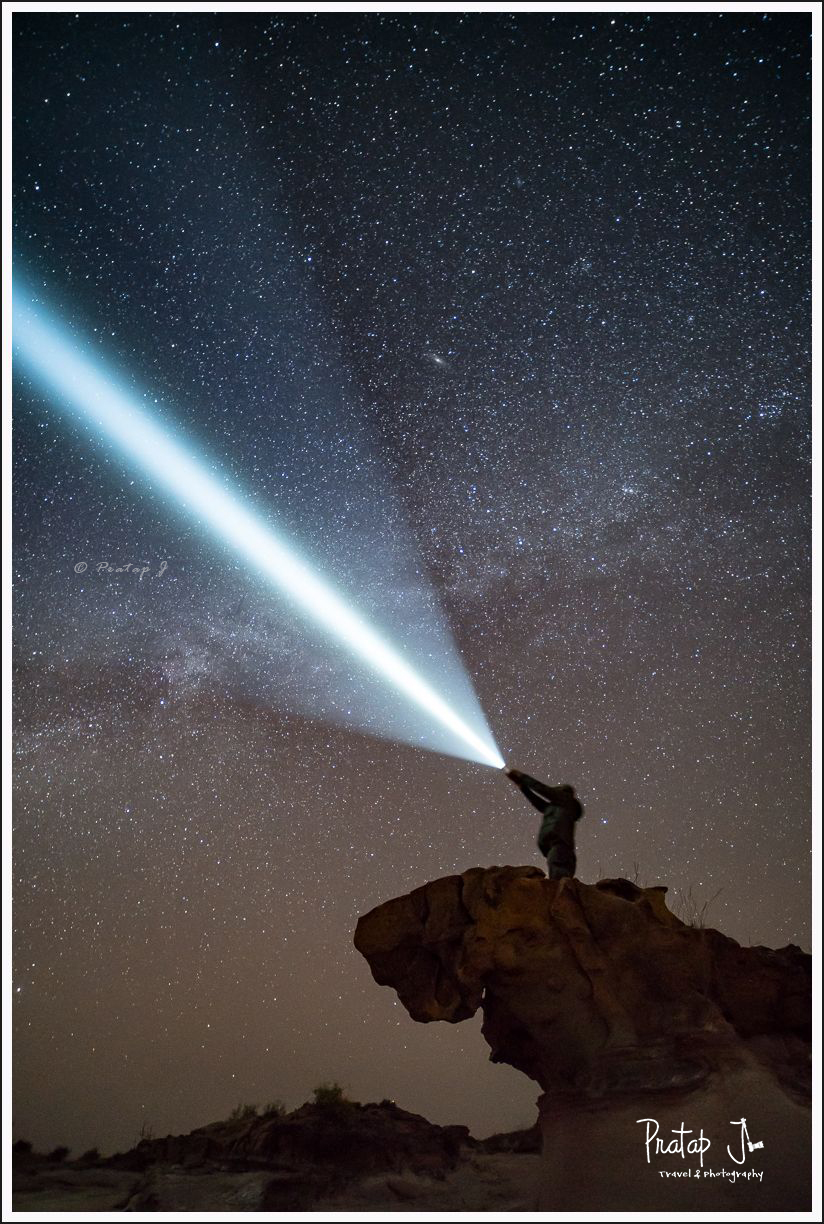
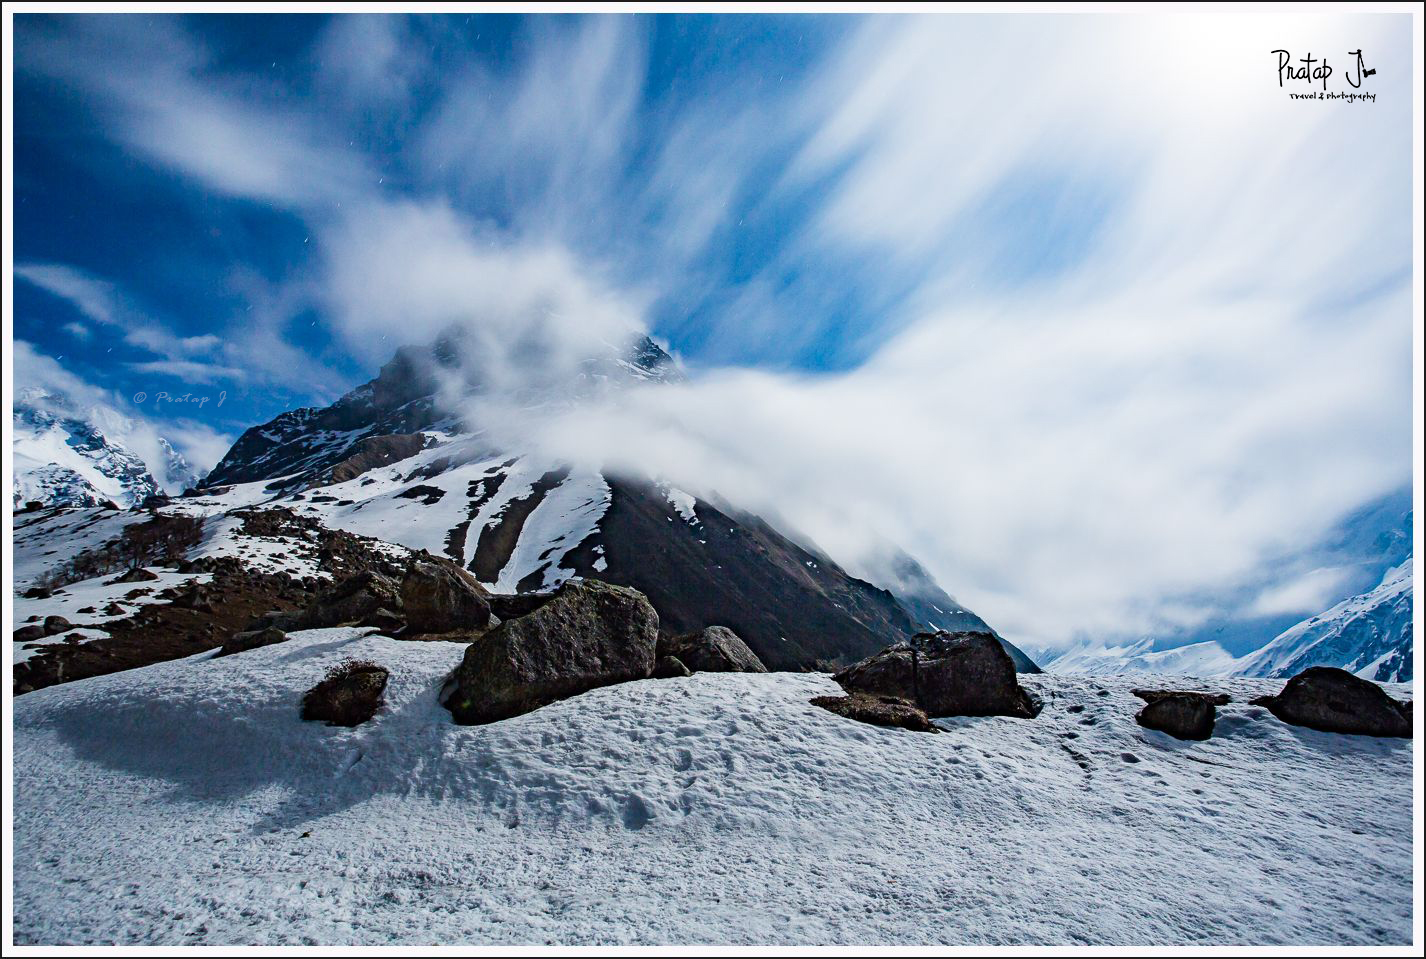
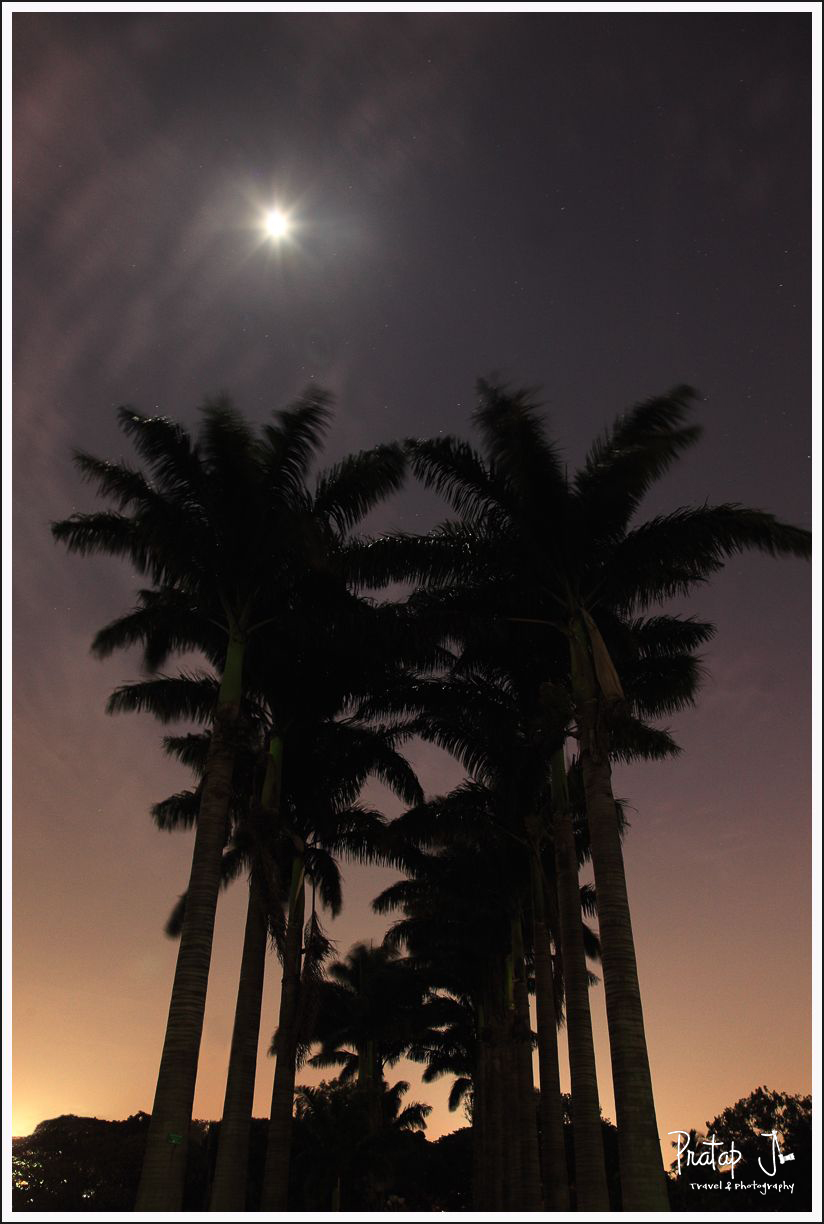
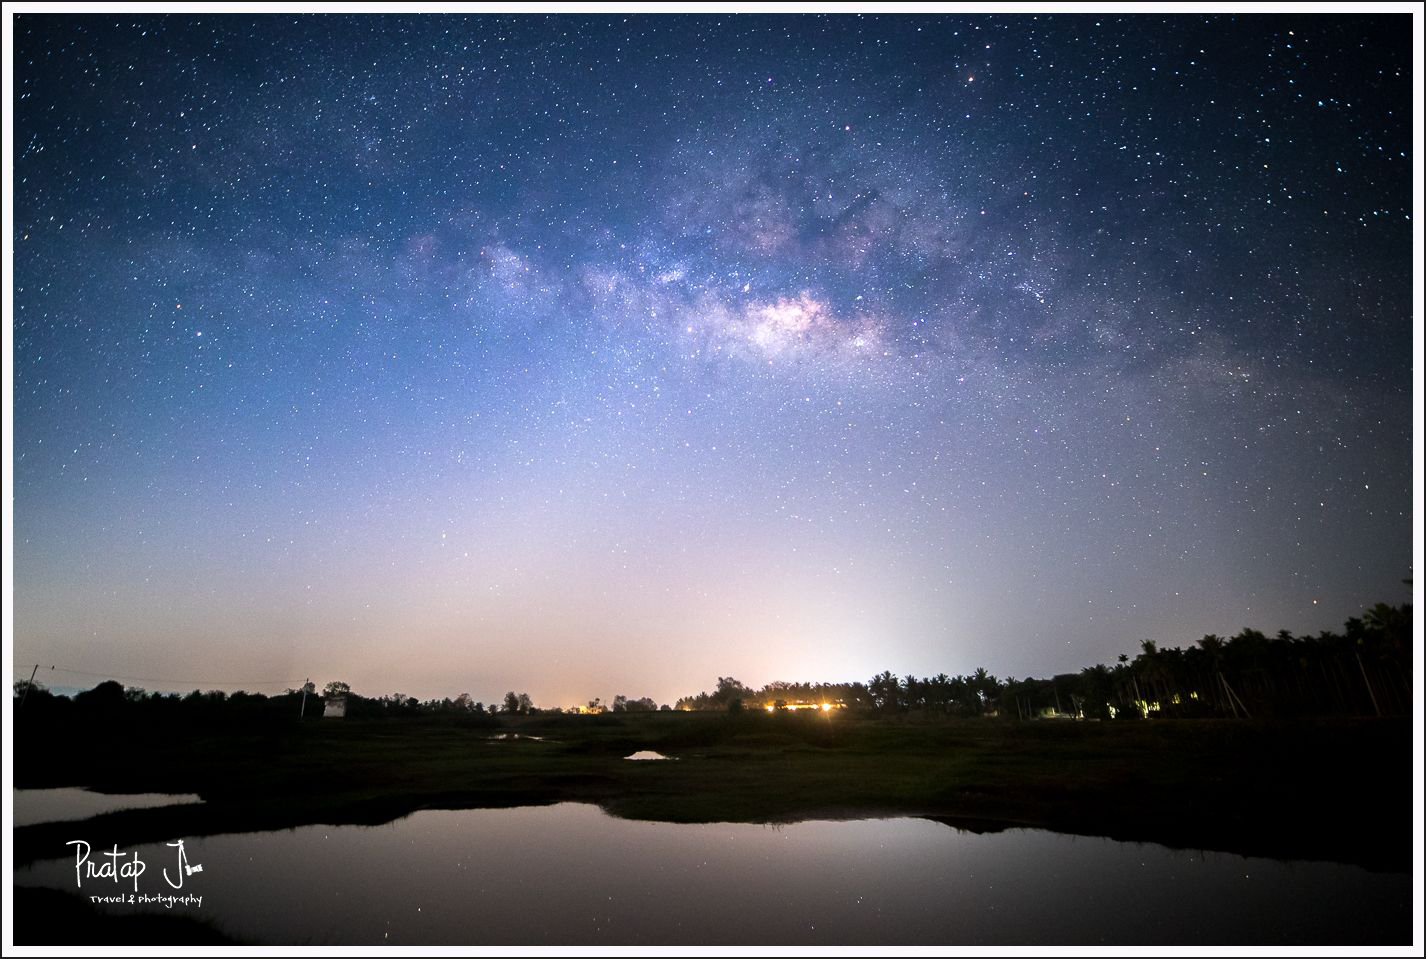
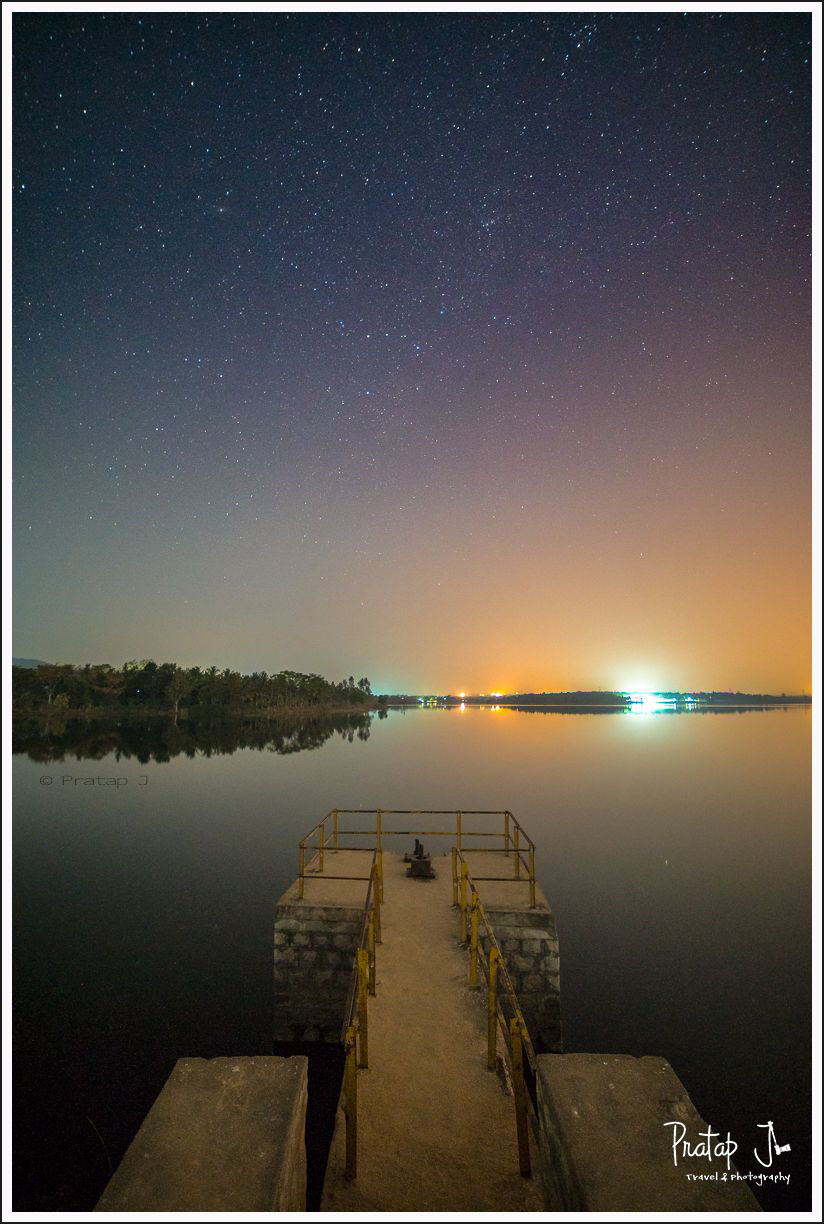
We will keep it simple and try and shoot what we can normally see with the naked eye at night. A few examples:


And here is a timelapse of the Milky Way rising over a period of 6 hours:
Equipment for Astrophotography
While it is important to have a camera that can shoot in manual mode to get good astro photos, it is also essential to consider the following when you choose your equipment:
- A camera that has good high ISO noise control decides the quality of your final image. Most modern DSLRs are capable of shooting clean images above ISO 800. Astro photos are generally shot between ISO 800 and ISO 3200. Shooting in RAW format is highly recommended.
- A “fast” ultra wide angle lens is essential to get good astro photos. Fast here refers to a lens that has a maximum aperture like F2.8 (small f number means wide lens opening). The idea is to gather as much light in as short a period as possible. With an ultra wide angle lens, you can capture more of the sky along with an optimum amount of foreground. While it is possible to shoot the sky with longer lenses, you are limited in your compositions. If your intention is to shoot the moon, then having a very long telephoto lens is a must. Any lens that you use for astro work must be able to focus manually as auto focus will not work reliably in low light.
- A sturdy tripod is important.
- An intervalometer (to shoot trails) is good to have. An intervalometer is a device that you connect to the camera and program to take photos at predefined intervals.
- A flashlight is optional. You can use it for light painting.
It is not necessary to shoot with a DSLR. My favourite camera for astrophotography is the Sony RX100 Mark IV which is an advanced point and shoot. It has a fast aperture of 1.8 and can shoot clean images in RAW format at high ISOs.
Planning for Astro Photos
The most essential step for astrophotography is planning. How should you pick your location and plan your shot?
- To shoot the Milky Way and star trails, you need a clear night which is as dark as possible. Hence you should plan your shoot far away from areas of light pollution on a night when the moon is either not visible or very dim. You can use apps or websites that provide details about the phases of the moon to pick a day appropriate for astrophotography. Plan your shoots during a new moon or the 4 days before or after it.
- If you indent to capture the Milky Way, you need to shoot between the months of March and October when you are in the Northern Hemisphere like here in India. The galactic core of the Milky Way is brightest between April to July. Although the Milky Way is indeed visible throughout the year, it is not very evident in other months. This excellent post describes everything you need know about shooting the Milky Way.
- It helps to have an interesting foreground when you shoot the Milky Way. So scout around during the day to find interesting spots where you can shoot later at night. To capture star trails, it helps to have the foreground aligned with the North Star.
- To shoot the moon, it is best to shoot on a full moon night.
In India, traveling to higher altitudes will get you clear skies that are free from air and light pollution. Places like Ladakh and the high mountains in Uttaranchal and Himachal are great for astro work. In the plains it is nearly impossible to get clear skies in cities and towns. The best thing to do would be to drive a little away from areas of human development.

Useful Apps and Websites:
The mother of all photography planning apps is Photo Pills (iOS and Android). It is an all-in-one tool that can help you, calculate exposures, find the Milky Way, North Star among a bunch of other things.
Shooting Astro Photos
There are different types of astro photos that you can take. In all of these types, the idea is to get the basic exposure right in the camera. Once you get the exposure correct, you can fine process the photo in a computer to extract more details and make the celestial objects stand out.
Apart from capturing the night sky, you can even try light painting to make interesting astro photos. Mixing steel wool photography with a star-studded night sky is a popular idea. In all these methods it is important to balance the exposure from ambient and artificial light. Use the settings given here as a starting point and experiment based on the situation in the field.
Milky Way Photography
To capture the Milky Way you need to release the shutter for long durations to get the maximum amount of light into the sensor. Since you shoot when it is dark, the exposure times are generally in the order of 20 to 30 seconds when the aperture is larger than f2.8 and the ISO higher than 800. The Milky Way is faint compared to the stars, so do not try to mix ambient light when shooting for the first time.
You must set the lens to manual focus and focus to infinity. Auto focus would fail in low light. If your lens does not have an infinity focus marking, find out the infinity focus point during daytime and make a note of it by placing a dot in your lens.
Here are typical camera settings that you can start with when it is a really dark night with no artificial light:
- ISO: 1600
- Shutter Speed: 30 seconds
- Aperture: F2.8
- Lens focussing: Manual and focused to infinity.
- Long Exposure NR: Turn Off
Needless to say, you should mount your camera on a tripod before you click. You can never hand-hold the camera when the shutter speed is slow. After you shoot, review the photo on the back of the LCD to check if the exposure is correct. It helps to use the histogram in your camera to see if the image is under exposed or over exposed. You can also check to see if the Milky Way appears correctly in the photo and if the stars are in focus. The stars and Milky Way may not look as clear and evident as you see in the photos below, which is fine. Processing them later in a computer will bring out the colours, clarity and contrast of the galactic core.
After you review the image, adjust the exposure and focus settings based on what you see. If the image looks over exposed, reduce the shutter speed and ISO instead of narrowing the aperture. When the shutter speed is longer than 30 seconds the celestial objects don’t appear sharp. The earth’s revolution causes them to be blurry.
Tip: Use a remote shutter release or the built in timer your camera to avoid shake induced by your finger when you press the shutter button.
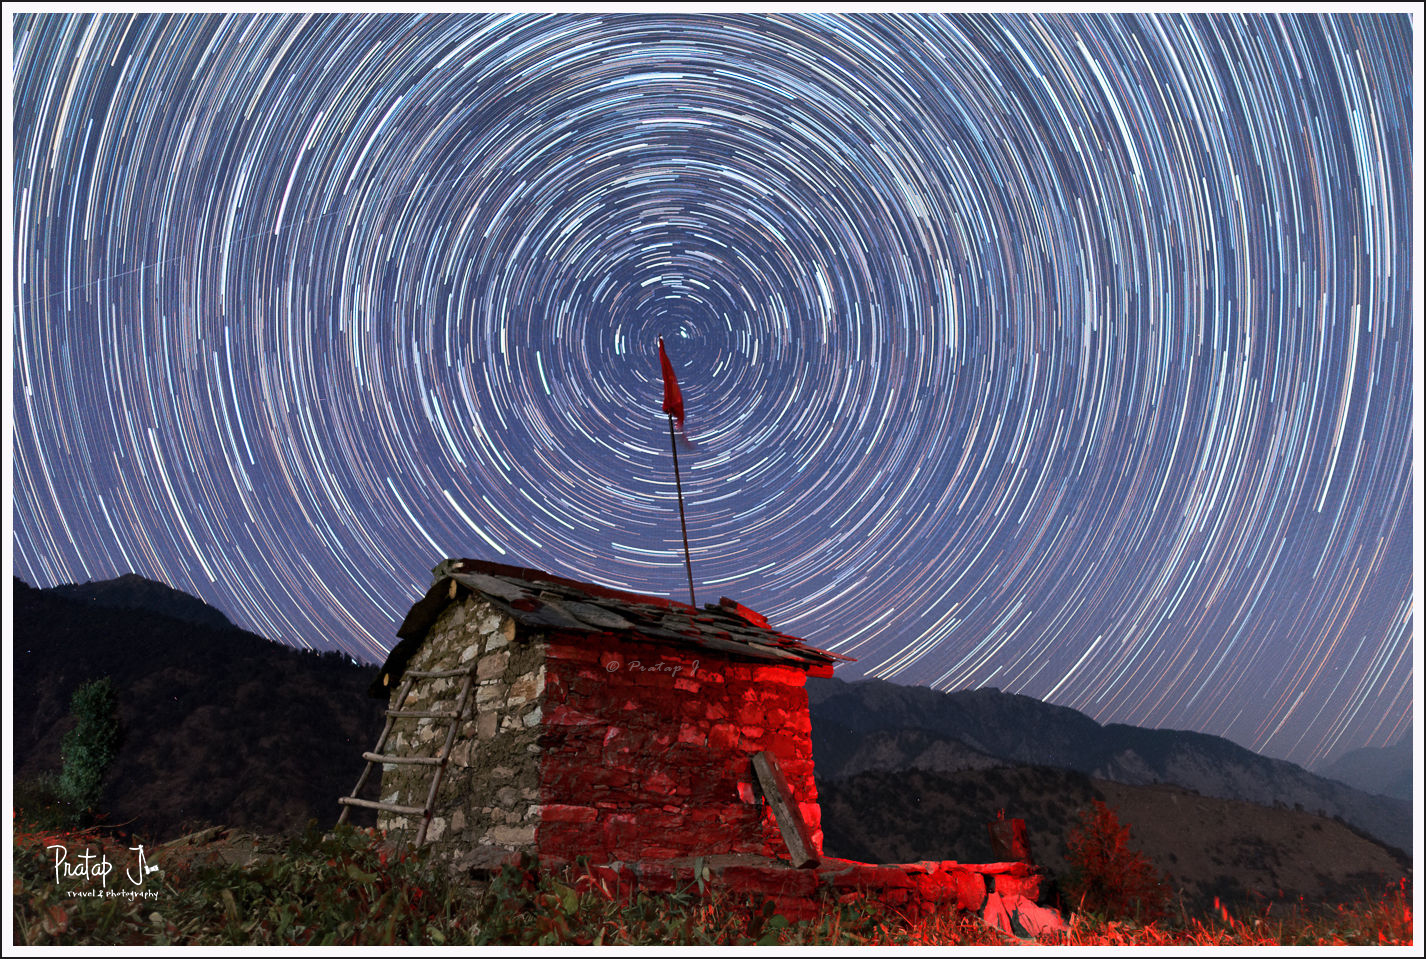
Star Trail Photography
To capture the movement of stars in the sky as trails, you need to shoot for at least 45 minutes or more. There are two methods by which you can achieve this.
In the first, less preferred method, you could leave the shutter released for the entire duration of the shoot using the bulb mode on your camera and an external remote. In method two, you shoot several photos at regular intervals over a period of 45 minutes or more. Each photo is of a much shorter duration like 30s. Later, you stack the individual photos using a software like StarStax.
The disadvantage of using the former method is that having the shutter released for long periods of time causes the camera sensor to overheat and the battery to drain faster. The most preferred method of shooting star trails, hence, is to take individual exposures at regular intervals and combine them later.
You can use the same camera settings as for shooting the Milky Way to shoot the individual exposures. Use an intervalometer to take photos at predetermined intervals. Set a 2 second gap between shots and take at least 70-100 photos that you can stitch later. If the exposure of each photograph is 30 seconds, and you have a 2 second gap in between photos, you will need approximately 53 minutes to shoot 100 photos (32 seconds x 100 = 3200 secs which is approximately 53 min). During this time, you must take care that your camera lens does not get fogged up due the weather conditions and you don’t move the camera or get cloud cover in your frame. Both of these will ruin the final image.
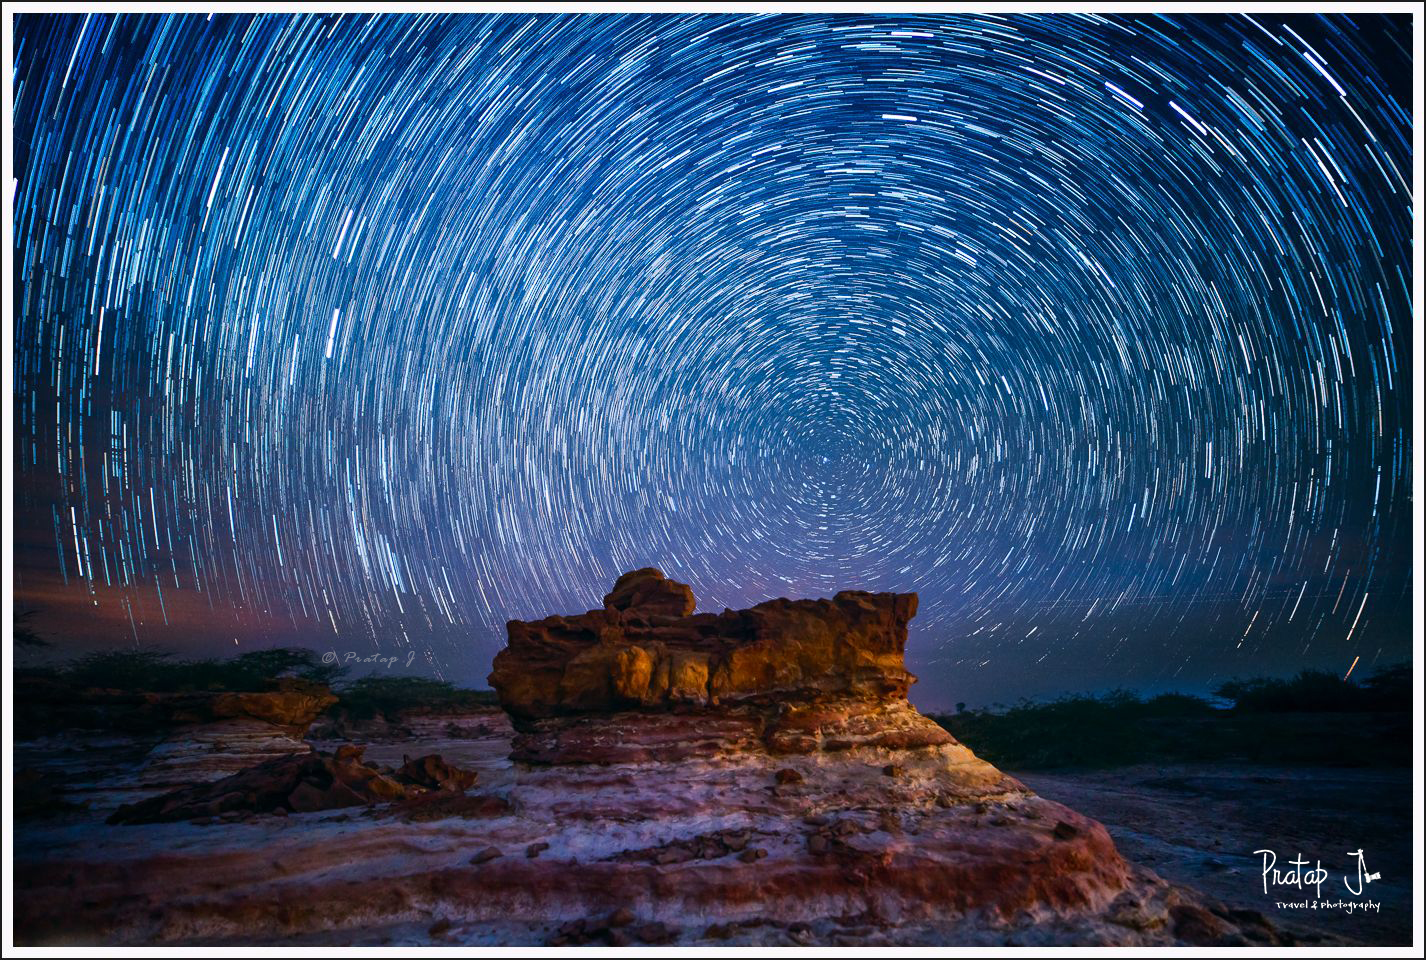
To get concentric star trails around your subject of interest you must compose taking into consideration the position of the North Star because all other stars revolve around the North Star.
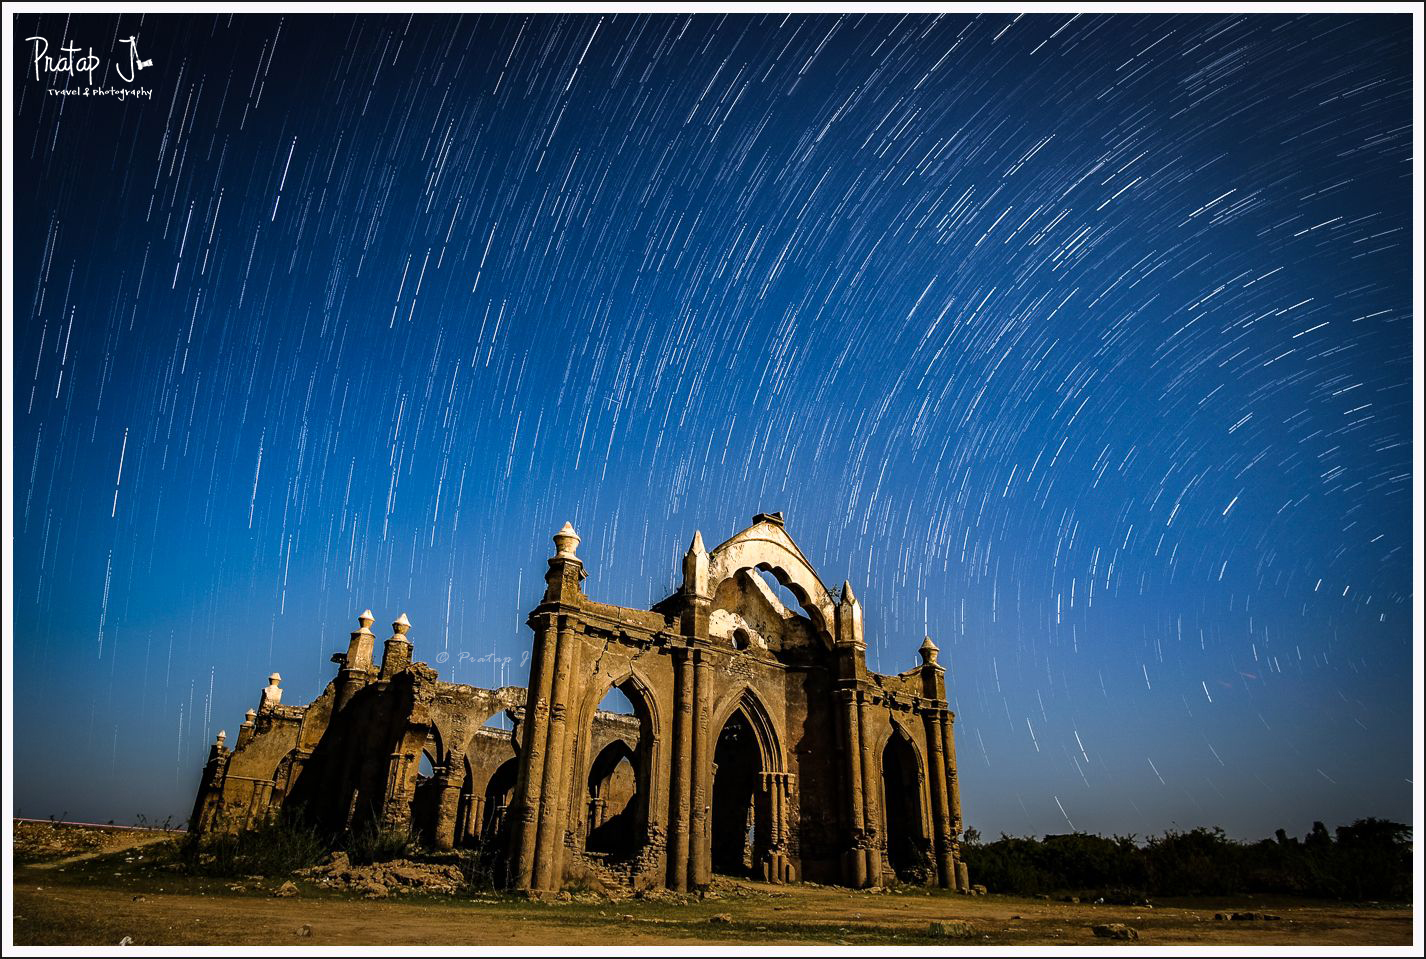

Your composition may not always allow you to capture concentric circles. That should not stop you from attempting to shoot trails.
Capturing Just the Night Sky
It is not necessary to always include the Milky Way or do star trails when you shoot the night sky. You can take very nice landscapes photos with celestial objects in the frame. The settings here then varies based on how you wish to balance the ambient light from man-made objects and the light in the night sky. A good starting point would still be the settings given above.


Processing Astro Photos
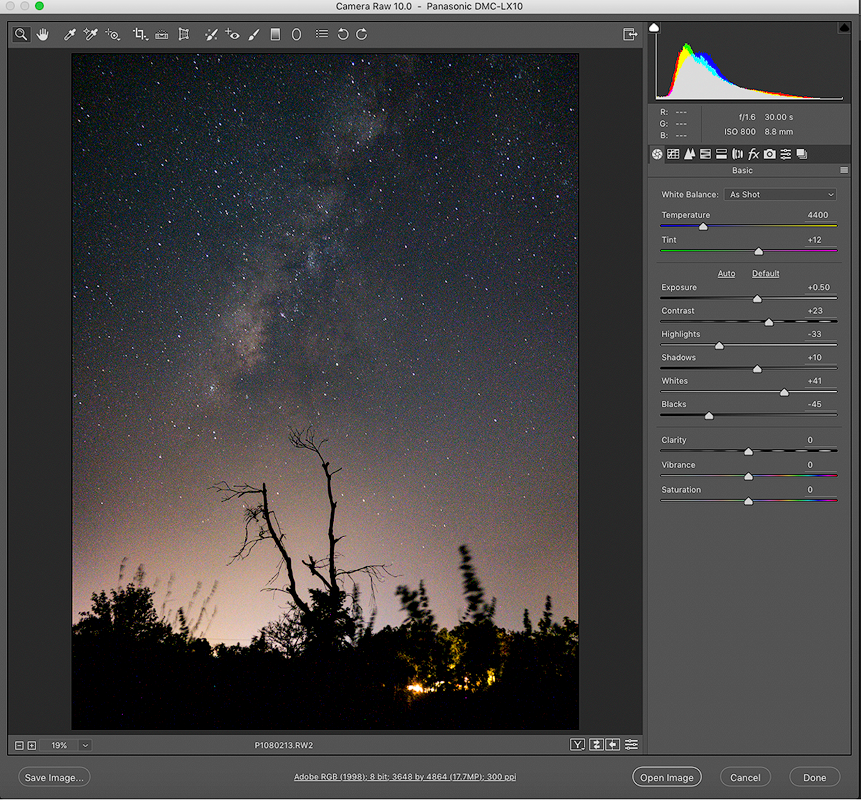
Astro photos need extra care in the digital darkroom. My software of choice for post-processing is Adobe Lightroom and Adobe Photoshop. But there are several tools out there. Always shoot in RAW to get the maximum quality after image processing. Here is an overview of the steps involved in processing an astro photo:
- Noise reduction: Because astro photos are shot at ISO 800 and above, it is important to apply noise reduction techniques to clean up the image. It is best to turn off in-camera NR and use noise reduction algorithms in a image processing software.
- Haze removal and clarity improvements: To cut down the amount of haze in a photo (which is usually due to pollution and weather conditions), increase the clarity, contrast and run the de-haze tool (Adobe Camera RAW only). This can dramatically increase the visibility of celestial objects.
- White balance correction. Most cameras don’t get the white balance correct when shooting at night. One of the biggest advantages of shooting in RAW is that you can change the white balance later in post processing. Change the white balancing to something cooler to mimic the appearance of the night sky as we see with our naked eye.
- Sharpness: Increase the sharpness to make the stars stand out.
If you are combining images in StarStax, process the individual photos first before running them through StarStax. This is where the batch processing power of Lightroom comes in handy. Here is an excellent video tutorial on how to shoot and process star trails from start to finish.
You can even go to the extent of compositing your photo to replicate something you had in mind but could not achieve in the field. Here is an example:

Conclusion
Astrophotography is fun and addictive. But remember that there are very limited opportunities in a year. In India, the monsoon season coincides with the months when the galactic core of the Milky Way is the brightest. There are only a handful of new moon days in any calendar year. There is generally a lot of light pollution around. So it is essential to plan your shoot before hand. Also take safety into consideration when venturing away from human development.
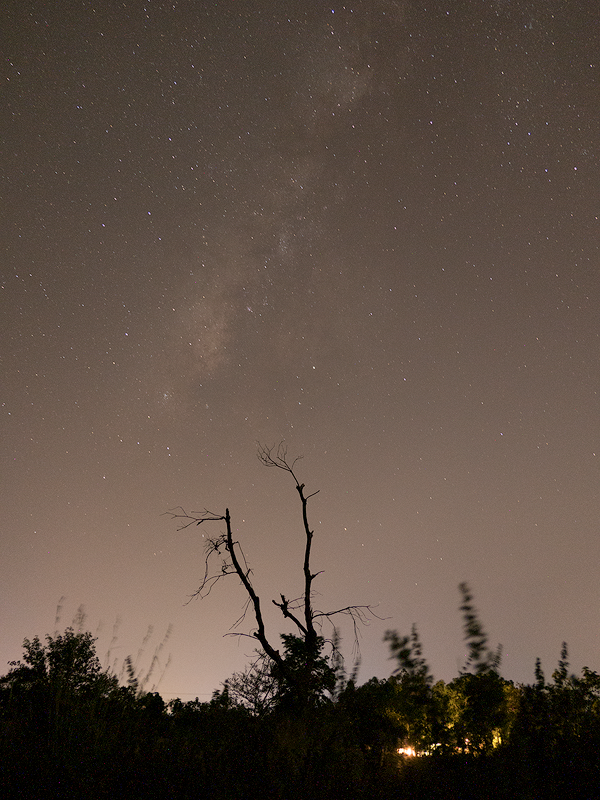
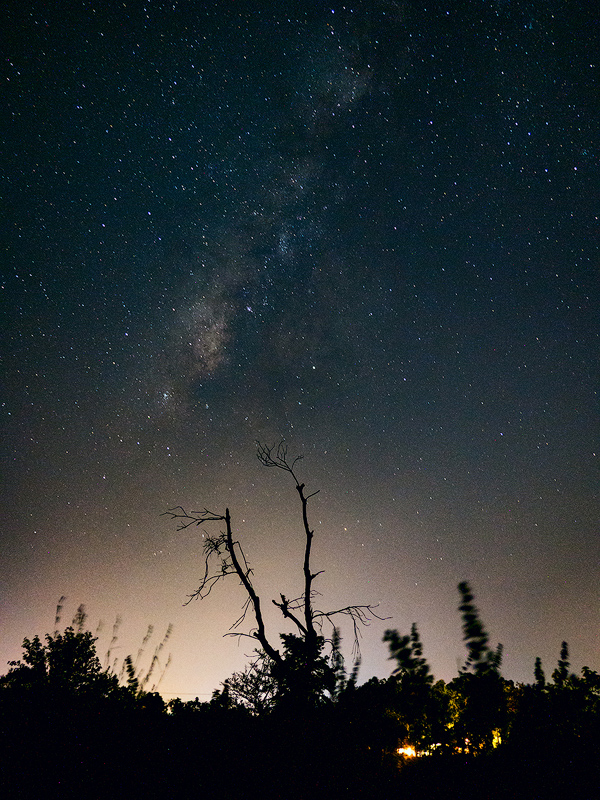
While it is not possible to shoot good astro photos inside Bangalore city, a short drive towards the outskirts presents excellent opportunities. For example, these photos were taken near the town of Kanakapura:

And this was taken on Mysore Road:
BONUS TIP IN THE NEXT PAGE – HOW TO SHOOT THE MOON

Pages: 1 2
38 Comments
Interested in the next Astro workshop.
Very nicely explined in crisp way.
I m Interested in astro Photography
If you are planning an astro shot, please I am interested to join
Wonderful content put up in this post! Count me in for the next Astro photography shoot.
Very nice explanation…brief and precise… Pls arrange for some workshop… I always plan for this but never get out and shoot…At least if we go in a group it’s better….
That is true. We are planning an astro tour at Darter. Will keep you posted.
Very well told Pratap. Nice content. Thanks for sharing.
I have to learn a lot from you, buddy. I’ve not tried any of these yet…and now I feel like I should have met you long back when I was in Bangalore
Thanks Alok. Maybe next time 🙂
Those are some amazing photographs. Could you please suggest some places around Bangalore for shooting the milky way?
I suggest you go away from Bangalore to some place where light pollution is less.
Unique as always, thanks for sharing
Hi which is this location? is it possible to share the exact coordinates or name of the location. its pretty interesting,
Planning to visit this place in my next visit to India.
Thanks
Yogeesh
Thanks a lot for the information. Can you suggest some good astrophotography cameras under 90,000? It would be really helpful…
Prioritise the lens over a camera.
Ok, can you suggest that should I go towards Canon or Nikon ecosystem for lenses and dslrs as there are a lot of choices. Thank you
You can buy a Canon or Sony mirrorless camera.
Thanks man. Really helpful.
Thank you Shubham. I enjoy your travelogues. Honoured to have you visit my website.
Yay! That made my day.
Great pics. Can you tell me where in Karnataka you shot Milky way. Coorg? Just curious which dark places without light pollution would you recommend.
Hi, you can check areas with low levels of light pollution using Dark Site Finder. http://darksitefinder.com/
Nice article. Very informative and well written. Beautiful pics as well.
What kind of gear do you recommend
I’ve written about the kind of equipment in the post.
i just heard the term astrophotography a few days ago
right now I have an Olympus binocular and I am amazed at the stars i can see in moderately light polluted sky.
However, with limited money of around 60000, what gear can i buy to view/capture the night sky.
the images above seems to require some really expensive equipment.
should i invest in camera or in a telescope ?
Thanks in advance for your reply.
Hi Maneish. You can purchase a DSLR such as a Sony A6300, Canon, Sigma 16mm F1.4, a tripod and start shooting the night sky. If you are looking for a telescope to view the night sky, sorry I cannot be of much help as that is not my area of expertise.
Very good write up on Astrophotography. Do you know anybody who organize tours on this or do you do it yourself.
Pls check http://www.darter.in
Wonderful article Pratap Ji. I am a beginner and currently having Nikon D5600 with kit lens. Please suggest Nikon lens that will be helpful for astrophotography. Also, do you organise workshop for astrophotography in north India also?
Thanks. Tamron 11-16 f2.8 is a good lens.
Is there any place in india to modify a dslr
No, I don’t know of any place in India
Beautiful pictures captured. I am also interested in astrophotography.
Thanks
Can you guide me in astrophotography and from where to start as I am new to this field
Hi, you can watch YouTube/website tutorials to learn the basics and then join some workshops to gain practical knowledge. Apart from my own website, you can also see https://www.lonelyspeck.com/astrophotography-101/